
 ## **3. Chu Chu Island: Hungry Muto**
Gulla's invasion of Chu Chu Island has begun! Help Muto defeat Gulla by cooking him some delicious food!
### **3-1. Getting Started**
## **3. Chu Chu Island: Hungry Muto**
Gulla's invasion of Chu Chu Island has begun! Help Muto defeat Gulla by cooking him some delicious food!
### **3-1. Getting Started**


| Ability Name | Required Dream Points | Effect |
| Gauge Freeze | 200 | Stops all movement on the gauge for 5 sec |
| Wake-up Call | 300 | Destroys 1 random Nightmare Music Box |
| Call Flopsy | 400 | Calls Mr.Flopsy to provoke nearby monster (Lasts 15 sec) |
| Kaboom | 900 | Destroys all monsters and prevents them from re-spawning for 10 sec |

| Stage Reached | Medal Name | Stats |
| 30 | Dream Defender - Stage 30 Conqueror | All Stats +3, HP/MP +300 |
| 40 | Dream Defender - Stage 40 Conqueror | All Stats +4, HP/MP +400 |
| 50 | Dream Defender - Stage 50 Conqueror | All Stats +5, HP/MP +500 |
| 60 | Dream Defender - Stage 60 Conqueror | All Stats +6, Attack Power/Magic ATT +1, HP/MP +600 |
| 70 | Dream Defender - Stage 70 Conqueror | All Stats +7, Attack Power/Magic ATT +1, HP/MP +700 |
| 80 | Dream Defender - Stage 80 Conqueror | All Stats +8, Attack Power/Magic ATT +2, HP/MP +800 |
| 90 | Dream Defender - Stage 90 Conqueror | All Stats +10, Attack Power/Magic ATT +2, HP/MP +900 |
| 100 | Champion Dream Defender | All Stats +15, Attack Power/Magic ATT +3, HP/MP 1,000 |
 * As soon as you rescue your first Rock Spirit, a Toxic Spirit will begin to chase you. If it touches you, you will lose all the spirits you are currently escorting.
* The more Rock Spirits you rescue, the larger and faster the Toxic Spirit becomes.
* In addition to the Toxic Spirit, you may encounter Spirit Fragments. Bumping into these will not cause you to lose your spirits, but it will briefly stop your movement.
* As soon as you rescue your first Rock Spirit, a Toxic Spirit will begin to chase you. If it touches you, you will lose all the spirits you are currently escorting.
* The more Rock Spirits you rescue, the larger and faster the Toxic Spirit becomes.
* In addition to the Toxic Spirit, you may encounter Spirit Fragments. Bumping into these will not cause you to lose your spirits, but it will briefly stop your movement.

< Toxic Spirit & Spirit Fragments >
* Lead the rescued Rock Spirits to the escape portal in the center of the map to earn points. | Spirits Rescued at Once | Points Earned | | ----------------------- | ------------- | | 1 | 200 | | 2 | 500 | | 3 | 1,000 | | 4 | 1,500 | | 5 | 2,500 | ### 5-3 Rewards * You will receive 1 Spirit Coin for every 1,000 points earned upon clearing Spirit Savior. * A maximum of 30 Spirit Coins can be obtained per day. * You can exchange 3 Spirit Coins for one Arcane Symbol: Arcana. ## 6. Morass: Ranheim Defense *Utilize the pillar of light, the Ranheim Rod, to deafeat the fragments of Hekaton’s body and halt his resurrection!*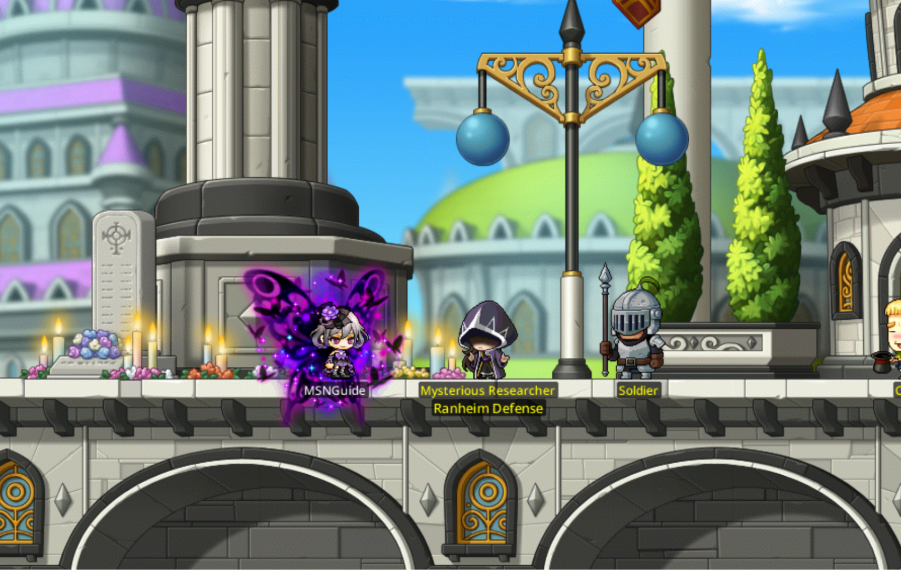 ### 6-1. Getting Started
* You must be Lv. 230 or higher and have completed the Morass story quest. Speak with the Mysterious Researcher in Trueffet Square to enter.
* This content is solo play only.
* You can enter Ranheim Defense up to 3 times per day. An entry is only consumed when you successfully clear the mission
### 6-2 Gameplay
* When the mission begins, monsters will start swarming the map.
* Defeating monsters will fill the yellow gauge at the top of the screen. This gauge is your energy source for attacking bosses.
* The first boss will spawn 10 seconds after you enter. After you defeat it, the next boss will spawn after a short delay, and so on.
* Track the boss's location using the red dot on the mini-map or the on-screen arrow.
* Each boss will launch attacks at the Ranheim Rod in the center of the map. If the Rod's HP (the top red gauge) runs out, the mission fails.
* To damage the bosses, you must use the energy you've collected.
* Stand on one of the Light Magic Launchers in front of a boss and press the Interact/Harvest key to attack.
* The final boss, Hekaton's Fragment, teleports every time it gets hit, so you'll need to strike it multiple times to take it down.
* Defeat all 10 bosses within the 10-minute time limit to claim victory.
### 6-1. Getting Started
* You must be Lv. 230 or higher and have completed the Morass story quest. Speak with the Mysterious Researcher in Trueffet Square to enter.
* This content is solo play only.
* You can enter Ranheim Defense up to 3 times per day. An entry is only consumed when you successfully clear the mission
### 6-2 Gameplay
* When the mission begins, monsters will start swarming the map.
* Defeating monsters will fill the yellow gauge at the top of the screen. This gauge is your energy source for attacking bosses.
* The first boss will spawn 10 seconds after you enter. After you defeat it, the next boss will spawn after a short delay, and so on.
* Track the boss's location using the red dot on the mini-map or the on-screen arrow.
* Each boss will launch attacks at the Ranheim Rod in the center of the map. If the Rod's HP (the top red gauge) runs out, the mission fails.
* To damage the bosses, you must use the energy you've collected.
* Stand on one of the Light Magic Launchers in front of a boss and press the Interact/Harvest key to attack.
* The final boss, Hekaton's Fragment, teleports every time it gets hit, so you'll need to strike it multiple times to take it down.
* Defeat all 10 bosses within the 10-minute time limit to claim victory.

 < Boss Location Marker > < Interact with the yellow tower to attack the boss >
### 6-3 Rewards
* Clearing Ranheim Defense will reward you with two Arcane Symbol: Morass.
## 7. Esfera: Esfera Guardian
*Stop the Mirror World creatures coming through the Dimensional Gates, and destroy the gates with Shubert’s Special Turret!*
< Boss Location Marker > < Interact with the yellow tower to attack the boss >
### 6-3 Rewards
* Clearing Ranheim Defense will reward you with two Arcane Symbol: Morass.
## 7. Esfera: Esfera Guardian
*Stop the Mirror World creatures coming through the Dimensional Gates, and destroy the gates with Shubert’s Special Turret!*
 ### 7-1. Esfera Guardian Special Content Introduction
* Maplers who are Lv. 235 or higher and have completed the Esfera story quest can enter by speaking with NPC Shubert on the 'Esfera - Base Camp' map.
* Esfera Guardian is content for up to 1 player and does not support party play.
* Esfera Guardian can be entered up to 3 times per day, and an entry count is deducted only when the content is cleared.
### 7-2 Gameplay
* When Esfera Guardian begins, monsters appear on the map.
* Defeating monsters fills a gauge at the bottom of the screen, and each slot of the gauge allows you to fire one shot.
* The gauge can hold up to 10 shots at a time.
### 7-1. Esfera Guardian Special Content Introduction
* Maplers who are Lv. 235 or higher and have completed the Esfera story quest can enter by speaking with NPC Shubert on the 'Esfera - Base Camp' map.
* Esfera Guardian is content for up to 1 player and does not support party play.
* Esfera Guardian can be entered up to 3 times per day, and an entry count is deducted only when the content is cleared.
### 7-2 Gameplay
* When Esfera Guardian begins, monsters appear on the map.
* Defeating monsters fills a gauge at the bottom of the screen, and each slot of the gauge allows you to fire one shot.
* The gauge can hold up to 10 shots at a time.
 * Once the gauge is filled, go to Shubert's Special Turret and press the “Sit” key to fire it and destroy the Dimensional Gates.
* The turret allows you to use one of two shots: the first costs 1 slot on the gauge, and the second, more powerful shot costs 3 slots.
* Destroying all Dimensional Gates clears the mission.
* Once the gauge is filled, go to Shubert's Special Turret and press the “Sit” key to fire it and destroy the Dimensional Gates.
* The turret allows you to use one of two shots: the first costs 1 slot on the gauge, and the second, more powerful shot costs 3 slots.
* Destroying all Dimensional Gates clears the mission.
 ### 7-3 Play Rewards
* Clearing Esfera Guardian will reward you with two Arcane Symbol: Esfera.
---
# Agent Instructions
This documentation is published with GitBook. GitBook is the documentation platform designed so that both humans and AI agents can read, navigate, and reason over technical content effectively. Learn more at gitbook.com.
## Querying This Documentation
If you need additional information that is not directly available in this page, you can query the documentation dynamically by asking a question.
Perform an HTTP GET request on the current page URL with the `ask` query parameter, and the optional `goal` query parameter:
```
GET https://docs.maplestoryn.io/msn-101/beginners-guide/monster-and-dungeon/arcane-river-special-content.md?ask=
### 7-3 Play Rewards
* Clearing Esfera Guardian will reward you with two Arcane Symbol: Esfera.
---
# Agent Instructions
This documentation is published with GitBook. GitBook is the documentation platform designed so that both humans and AI agents can read, navigate, and reason over technical content effectively. Learn more at gitbook.com.
## Querying This Documentation
If you need additional information that is not directly available in this page, you can query the documentation dynamically by asking a question.
Perform an HTTP GET request on the current page URL with the `ask` query parameter, and the optional `goal` query parameter:
```
GET https://docs.maplestoryn.io/msn-101/beginners-guide/monster-and-dungeon/arcane-river-special-content.md?ask=